Construction and Installation of the Floating Dock
We plan to build and install three dock sections this year. The dock will consist of one fixed section (6' x 12') that will be mounted on the concrete base that was installed last year. There will be two floating sections (6' x 12' each) connected by hinges and anchored off the fixed section. A moveable ramp ( 3' x 5') will connect the fixed and floating sections.
Supplies: You need a lot of Pressure Treated Lumber, 8 more bags of concrete, 8 floats, 300 + hot dipped galvanized (HDG) bolts in various sizes, a couple dozen HDG brackets, 50' galvanized chain, 20' rebar, 12' galvanized pipe, 600 deck screws (so far), 4 HDG deck cleats, 4 pipe mounts, 4 HDG leg pads etc., etc.
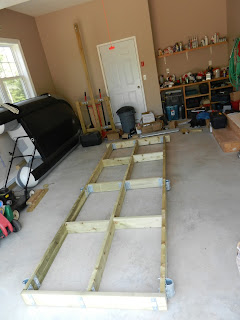
Floating Section 1: Basic Frame (6' x 12') with female hinge sections attached
Floating Section 1: Completed Frame with cross braces and all corner brackets and stiffeners installed.
Floating Section 1: Frame with floats in place (upside down of course)
We needed a crane to get the dock frame down to the water, but they sent us the wrong kind.
So we had to improvise.
Floating Dock Section 1: On B&J's ramp with floats mounted
Floating Dock Section 1: Decking complete and ready for the water.
Now all I have to do is repeat the process for the second floating dock section!
Each floating dock section gets two 50 kg anchors to hold them in place. Pouring the concrete blocks in the wheelbarrow makes it a lot easier to get the 110 lb anchors to the water. Each block is reinforced with rebar and connected to a section of galvanized chain.
While waiting for Home Depot to deliver the last two floats, I built the fixed dock section.
Fixed Dock Section: Completed fixed dock section (4' x 12') with leg brackets attached.
Fixed Dock Section: installed on shore base that was completed last year. This section is supported by the concrete and wood base on the beach and four 1.9" OD galvanized pipe sections with foot pads. Still working on the decking.


